
Reflective Road Stud Installation: A Step-by-Step Guide
Reflective road studs, also known as cat’s eyes or raised pavement markers, play a vital role in road safety by improving visibility at night and during adverse weather conditions. This comprehensive Reflective Road Stud Installation Guide walks you through the correct procedures, tools, and best practices to ensure a secure and long-lasting installation.
What Are Reflective Road Studs?
Reflective road studs are safety devices installed on roads to guide drivers and enhance lane demarcation. These studs reflect headlights from vehicles, making road lanes and boundaries more visible. They are widely used in highways, urban roads, parking lots, and pedestrian crossings.
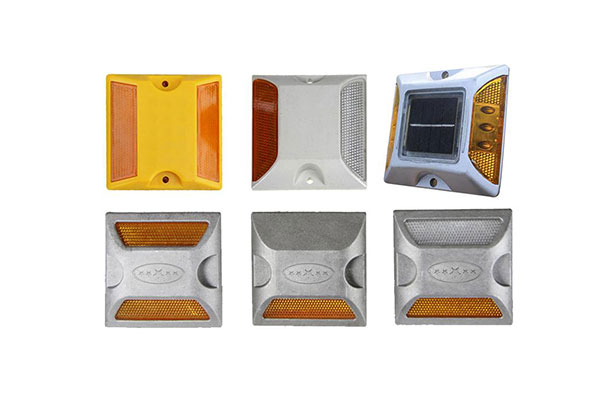
Common Types of Reflective Road Studs:
Tools and Materials Needed
Before you begin, prepare the following:
- Reflective road studs (plastic, aluminum, or solar type)
- Road marking adhesive or epoxy resin
- Drill with appropriate core bit (if needed)
- Road surface cleaner or brush
- Measuring tape or chalk line
- Personal protective equipment (PPE): gloves, safety vest, goggles
- Warning signs or traffic cones
Step-by-Step Installation Guide
1. Site Assessment and Preparation
Inspect the area where the road studs will be installed. Ensure the surface is clean, dry, and free of dust, oil, or debris. Use a wire brush or compressed air to clean the surface for optimal adhesion.
Tip: Avoid installing on uneven or damaged surfaces, as this can reduce bonding strength and shorten the product’s lifespan.
2. Marking the Installation Spots
Use a chalk line or measuring tape to mark where each road stud will be placed. Spacing depends on road type:
- Center line of highways: 9–15 meters apart
- Lane dividers or curves: 1–2 meters apart
- Pedestrian crossings or intersections: As needed for visibility
3. Drilling (If Required)
Some road studs, particularly aluminum or solar-powered types, may require anchoring bolts or screws. In such cases, use a drill to create pilot holes. Follow the manufacturer’s recommended drill size.
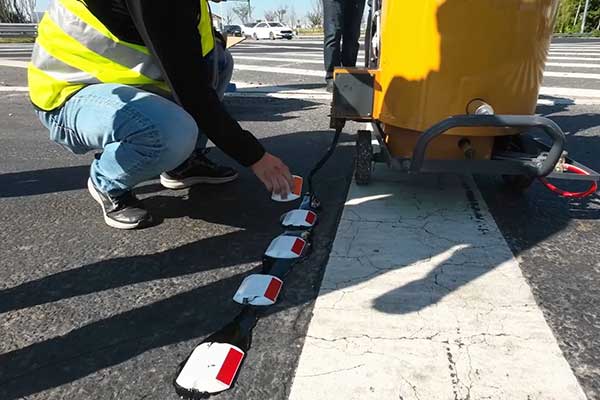
4. Applying Adhesive
Apply a layer of epoxy resin or road marking adhesive to the back of the stud or directly on the marked spot. Ensure a firm, even spread for proper bonding.
Caution: Wear gloves and avoid skin contact with the adhesive.
5. Placing the Stud
Immediately press the stud onto the adhesive and apply firm pressure. For mechanical fixing types, tighten the bolts or screws after the adhesive sets.
6. Curing Time
Allow the adhesive to cure for at least 1–2 hours (check manufacturer guidelines). During this time, prevent vehicles or pedestrians from disturbing the area.
7. Inspection and Testing
Once installed, inspect the road studs for alignment, firmness, and reflective visibility. Test at night to ensure the reflectors are effective and visible from a distance.
Maintenance Tips
- Clean regularly to remove dirt and grime from reflective surfaces.
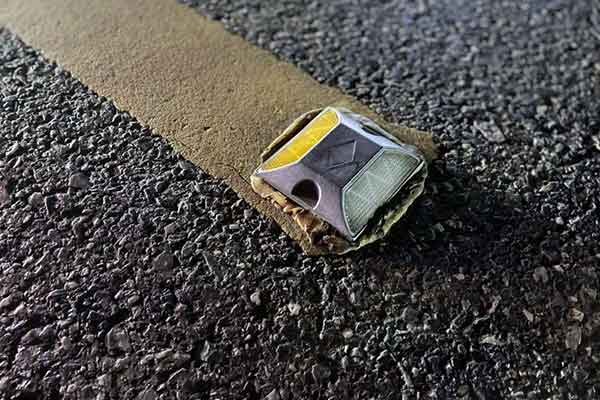
- Replace damaged or missing studs promptly.
- Inspect periodically, especially after winter or high-traffic seasons.
Common Mistakes to Avoid
- Installing on dirty or wet surfaces
- Using inadequate or expired adhesive
- Incorrect spacing between studs
- Failing to control traffic during installation
Final Thoughts
Proper installation of reflective road studs significantly enhances road safety and reduces nighttime accidents. By following this guide, road maintenance teams and contractors can ensure durable, secure, and effective installation. For best results, always use certified road studs and professional-grade adhesives.
If you’re sourcing high-quality reflective road studs, feel free to contact us today!