

Rubber Speed Bump Installation and Removal
Rubber speed bumps are a practical traffic-calming solution for parking lots, private roads, residential communities, commercial properties, warehouses, and other low-speed areas. Unlike asphalt or concrete speed bumps, rubber speed bumps are usually modular and mechanically fixed to the pavement, making them relatively easy to install, remove, replace, and relocate.
Proper installation is important for ensuring that a rubber speed bump remains stable under repeated vehicle traffic. At the same time, understanding the correct removal process helps prevent unnecessary damage to the speed bump and the pavement.
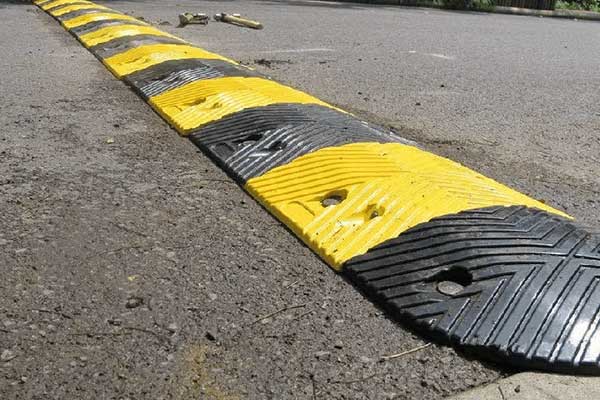
Where to Install Rubber Speed Bumps
Proper placement is essential. Rubber speed bumps should be installed in areas where drivers need to slow down before reaching pedestrians, intersections, entrances, or other potential hazards.
Common installation locations include:
- Parking lot entrances and exits
- Pedestrian crossings
- Apartment and condominium communities
- School zones and playground areas
- Warehouses and loading facilities
- Private driveways and access roads
- Hospital, hotel, and retail properties
- Gated communities
Before installation, the site should be evaluated for traffic flow, visibility, drainage, emergency access, and pavement condition.
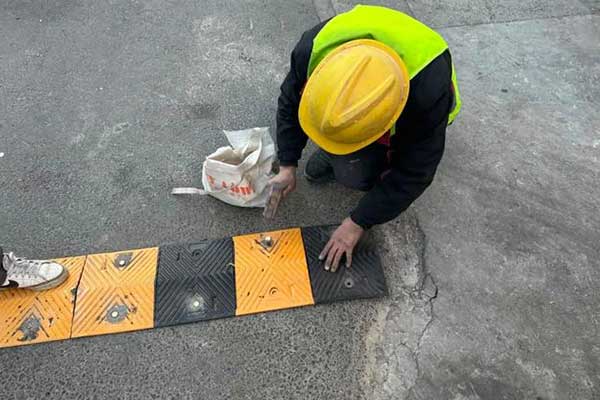
Rubber Speed Bump Installation Process
A professional installation creates a safer and longer-lasting result.
1. Site Assessment and Layout
Determine the optimal location and ensure that the speed bump will not obstruct drainage, traffic, fire lanes, or vehicle turning areas. The width and height of the speed bump will be selected according to the appropriate specifications based on the traffic conditions.
2. Surface Preparation
The pavement is cleaned of dirt, loose debris, oil, and standing water. A stable, level surface is important to keep the rubber speed bump firmly in place.
3. Positioning the Rubber Sections
Most rubber speed bumps are modular, with center sections and end caps. The pieces are aligned across the roadway to create a continuous, visible traffic-control feature.
4. Anchoring and Fastening
Each section is secured to asphalt or concrete using suitable anchors, spikes, bolts, or screws. Proper fastening prevents movement, lifting, or separation under repeated vehicle traffic.
5. Visibility Markings and Signs
Reflective strips, pavement paint, and advance warning signs help drivers see the speed bump in daylight, at night, and during poor weather conditions. Clear markings are an important part of safe rubber speed bump installation.
When is Rubber Speed Bump Removal Needed?
Rubber speed bump removal may be necessary when a property is being renovated, repaved, reconfigured, or converted to a different traffic-control plan.
Common reasons include:
- Parking lot resurfacing or pavement repairs
- Changes to traffic flow or vehicle access
- Damage to the rubber sections or anchors
- Installation of a new speed hump or traffic-control device
Because rubber speed bumps are not poured directly into the pavement, they are generally much easier to remove than concrete or asphalt structures.
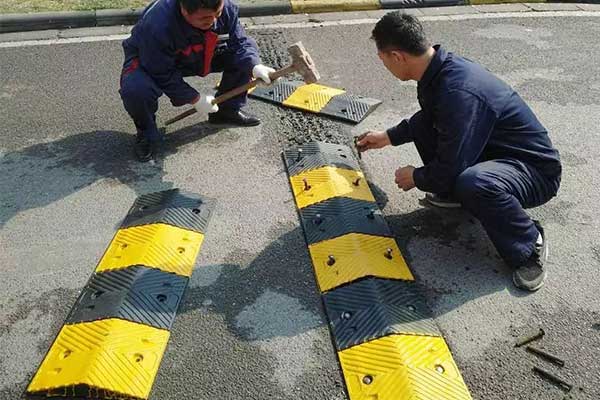
Rubber Speed Bump Removal Process
Professional removal protects the pavement and makes it easier to reuse or replace the speed bump.
The process typically includes:
- Removing bolts, anchors, or spikes from each modular section.
- Lifting and separating the rubber center pieces and end caps.
- Inspecting the units to determine whether they can be reused.
- Repairing anchor holes or minor pavement damage.
- Cleaning and leveling the installation area.
- Removing or updating related pavement markings and warning signs.
If the speed bump is still in good condition, it may be installed elsewhere on the property. Damaged sections can usually be replaced individually instead of replacing the entire system.
Rubber Speed Bump Maintenance
Regular maintenance can help extend the service life of a rubber speed bump.
Inspect the installation periodically for:
- Loose bolts
- Missing fasteners
- Cracked rubber
- Damaged end caps
- Worn reflective markings
- Movement under traffic
- Pavement deterioration around mounting points
If a section becomes damaged, replace it as soon as practical rather than allowing the problem to affect adjacent sections.
Conclusion
Proper rubber speed bump installation and removal are essential for maintaining an effective and safe traffic-calming system. From selecting the installation location and preparing the pavement to securing the speed bump and repairing the surface after removal, every step contributes to long-term performance.
For contractors, parking lot operators, property managers, and road safety suppliers, understanding the correct installation and removal process is essential when selecting and using rubber speed bumps for traffic-calming applications.